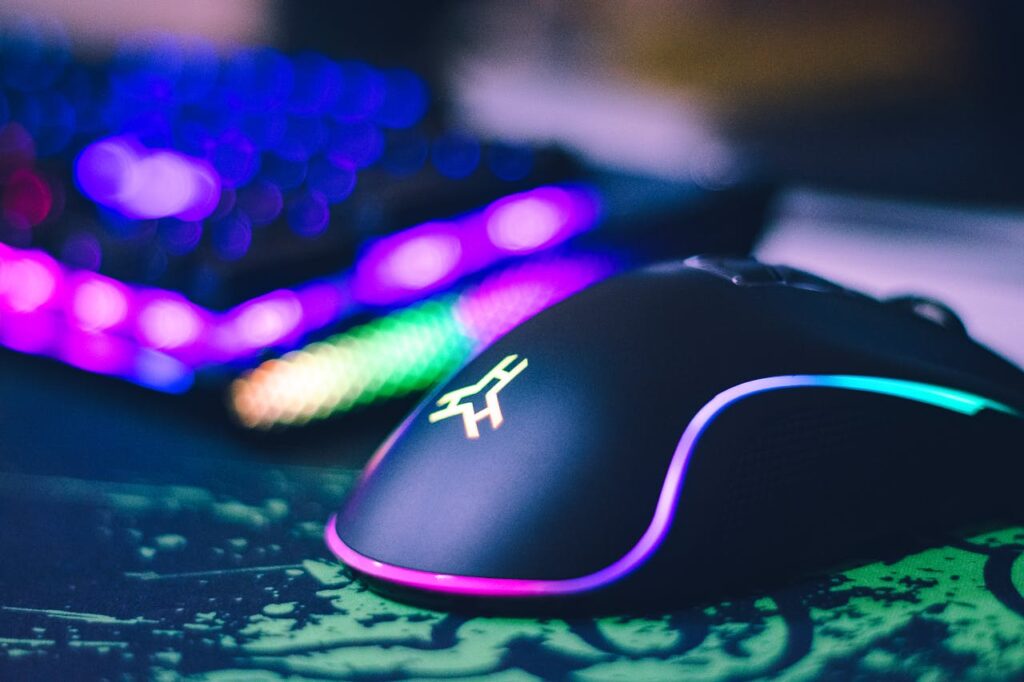
Mouse DPI (Dots Per Inch) is a crucial factor that affects cursor speed and accuracy. Whether you’re a gamer aiming for pixel-perfect precision or a professional seeking smoother navigation, adjusting DPI settings can enhance your experience significantly. You can use mouse DPI analyzer to adjust your DPI according to your need. In this blog, you will explore how to check mouse dpi and multiple ways that define how to change mouse DPI effectively and optimize it for different use cases.
Mouse DPI and Its Importance
What is mouse dpi? Mouse DPI determines how far the cursor moves in relation to physical mouse movement. A higher DPI results in faster cursor movement, while a lower DPI provides better control. Gamers, graphic designers, and everyday users can benefit from fine-tuning DPI settings according to their needs.
Why Does Mouse DPI Matter?
- For Gaming: Precision targeting in FPS games requires lower DPI (400-800), while high-speed movements in RTS games benefit from higher DPI (1600+).
- For Productivity: Graphic designers and video editors often adjust DPI for better cursor control.
- For General Use: Finding the perfect DPI setting ensures smooth navigation without excessive hand movement.
How to Check Your Mouse DPI
Before you get know how to change mouse dpi settings, it’s important to know your current DPI. Use our Mouse DPI Analyzer to measure your DPI instantly and accurately. You can also read this complete guide about how to check mouse dpi accurately.

Other Methods to Check Mouse DPI:
- Using a DPI Tester: Try our Mouse DPI Tester to measure your DPI settings.
- Check Manufacturer’s Specifications: Most high-end gaming mice specify DPI settings on their website or manual.
- Using a DPI Button: Many gaming mice feature a DPI button to toggle between predefined DPI settings.
How to Change Mouse DPI (Step-by-Step Guide)
Below is a simple step-by-step guide that shows you multiple ways to change mouse DPI across different devices and operating systems.
1. Using the DPI Button
Most gaming mice come with a DPI button that allows instant DPI adjustments. To change mouse DPI:
- Locate the DPI button on your mouse (usually beneath the scroll wheel).
- Press the button to cycle through preset DPI levels.
- Some mice come with LED indicators showing the current DPI setting.
2. How to Change Mouse DPI in Windows 11
If your mouse lacks a dedicated DPI button, you can adjust DPI through Windows settings:
- Open Settings (Win + I)
- Navigate to Devices > Mouse.
- Adjust the Pointer Speed under the “Mouse” section.
- For advanced settings, go to Additional Mouse Settings > Pointer Options and change DPI accordingly.
Quick Tip for Windows 11)
If you’re wondering how to change mouse DPI Windows 11, remember that some mice may sync settings automatically when connected. If you use gaming software like Logitech G Hub or Razer Synapse, open it to fine-tune DPI levels for each profile.
3. How to Change Mouse DPI Windows 10
For users on Windows 10, the steps are slightly different:
- Open the Control Panel.
- Go to Hardware and Sound > Devices and Printers.
- Right-click your mouse and select Mouse Settings.
- Under Pointer Options, adjust the Pointer Speed slider.
You can also open Settings → Devices → Mouse → Additional Mouse Options to modify DPI behavior directly.
If you’re specifically looking for how to change mouse DPI Windows 10, this method gives the same precision as Windows 11 but with a simpler layout.
4. How to Change Mouse DPI in Windows 7
Even though Windows 7 is older, you can still modify your DPI:
- Go to Control Panel > Mouse.
- In the Pointer Options tab, adjust pointer speed.
- If available, enable Enhanced Pointer Precision for smoother control.
That’s it! This is the simplest way for those searching how to change mouse DPI Windows 7 without needing any software.
5. How to Change Mouse DPI on Mac
If you’re a Mac user, here’s how to change mouse DPI:
- Open System Preferences from the Apple menu.
- Select Mouse.
- Adjust the Tracking Speed slider — this directly affects your mouse DPI.
Note: macOS doesn’t let you set an exact DPI number, but you can use this method to increase or decrease cursor speed effectively.
6. How to Change Mouse DPI on Chromebook
Chromebooks don’t have dedicated DPI controls, but you can change mouse sensitivity:
- Click the clock in the bottom-right corner.
- Open Settings > Device > Mouse and Touchpad.
- Adjust Mouse Speed to increase or reduce DPI-like sensitivity.
This helps anyone searching how to change mouse DPI on Chromebook. The process is simple but slightly limited compared to Windows or Mac.
7. How to Change Mouse DPI Without Software
If your mouse does not support software-based DPI changes, try these methods to change your mouse DPI:
- Adjust sensitivity settings via Windows or Mac.
- Use in-game sensitivity adjustments.
- Utilize our Mouse DPI Calculator to estimate DPI changes manually.
Those looking for how to change mouse DPI without software can also tweak in-game settings or browser sensitivity (especially on Chromebooks). Some modern mice save DPI profiles internally, try holding the DPI button for 3–5 seconds to cycle between saved modes.
8. How to Change Mouse DPI to 800
Many gamers prefer 800 DPI for accuracy in shooters and general use. Here’s how you can set it:
- If your mouse has a DPI button, press it until you reach 800 (some mice show it via LED colors).
- In software like Logitech G Hub, or Razer Synapse, move the DPI slider to 800 and save the profile.
- If you lack software, use our Mouse DPI Checker move the cursor across a known distance to ensure your DPI is close to 800.
9. How to Change Mouse DPI Without a DPI Button
If your mouse lacks a DPI button:
- Adjust DPI through Windows settings.
- Use software like Logitech G Hub, Razer Synapse, or Corsair iCUE (if supported).
- Modify in-game settings for better control.
Quick Summary To Change Mouse DPI
| Platform | Steps |
|---|---|
| Windows 11 | Settings → Devices → Mouse → Pointer Options |
| Windows 10 | Control Panel → Hardware → Mouse → Pointer Speed |
| Windows 7 | Control Panel → Mouse → Pointer Options |
| Mac | System Preferences → Mouse → Tracking Speed |
| Chromebook | Settings → Device → Mouse & Touchpad |
| Without Software | Adjust via system settings |
| Set to 800 DPI | Use DPI button or software slider |
How to Change Mouse DPI for Gaming
Gamers adjust DPI settings for different playstyles:
- Low DPI (400-800): Ideal for FPS games requiring precise aiming.
- Medium DPI (800-1600): Balanced setting for versatility.
- High DPI (1600+): Useful for fast-paced games and multiple monitors.
- Use Mouse DPI Converter to adjust DPI settings across various games.
Pro Tips for Optimizing Mouse DPI
Finding your ideal mouse DPI isn’t just about speed — it’s about balance, precision, and comfort. Once you’ve learned how to change mouse DPI, try these expert tips to fine-tune it for gaming, productivity, or general use.
1. Test Different DPI Levels
Don’t rely on a single setting. Experiment with multiple DPI levels using the Mouse DPI Analyzer or Mouse DPI Tester to see which one feels most natural. For example, 800 DPI often works well for shooters, while 1600+ is ideal for larger displays or multitasking.
2. Adjust for Screen Resolution
Your screen resolution directly affects how your cursor moves. If you’re using a 4K or ultrawide monitor, consider increasing your DPI slightly for smoother navigation. On smaller displays, a lower DPI (400–800) offers better control and precision.
3. Match DPI with Hand Movements
The best DPI setting depends on how you move your hand. If you make large wrist or arm movements, a low DPI setting gives more accuracy. For smaller, tighter hand motions, a higher DPI helps maintain smooth tracking. Adjust mouse DPI gradually until it aligns with your comfort level.
4. Customize DPI Per Application
Modern gaming mice and software allow per-application DPI profiles. Set low DPI for games requiring aim precision (like Valorant or CS2), medium DPI for browsing or office work, and high DPI for fast-moving tasks or multi-monitor setups.
Bonus Tip: Recheck Your Settings Regularly
After updates or system changes, recalibrate your eDPI using the Mouse eDPI Calculator. This make sure accuracy stays consistent across different resolutions, games, and OS update
Conclusion
Experiment with different DPI levels to find the perfect balance for your needs. Whether you need high precision for gaming, detailed control for creative work, or a comfortable setting for everyday use, understanding how to change mouse DPI is the key. By adjusting DPI settings and testing what feels best, you can optimize your mouse for smoother navigation, sharper accuracy, and a better overall experience.
Frequently Asked Questions (FAQs)
How to change DPI on mouse?
Most mice include a DPI button located near the scroll wheel. Pressing it switches between preset sensitivity levels instantly. For more accurate control, open your mouse software and manually adjust DPI values to suit your workflow or gaming needs.
How to change mouse DPI Windows 11?
Go to Settings > Bluetooth & devices > Mouse and open Additional mouse settings. Under the Pointer Options tab, adjust pointer speed or use your mouse’s companion software for exact DPI configuration. This allows smoother cursor movement based on your screen.
How to change Razer mouse DPI?
Launch Razer Synapse, select your mouse, and open the Performance tab. Here, you can set custom DPI stages or assign a button for quick DPI switching. Fine-tuning DPI helps you achieve the right sensitivity for different games or creative tasks.
How to change my mouse DPI?
Most modern mice have a DPI switch that lets you cycle through sensitivity presets. If yours doesn’t, open the manufacturer software such as Logitech G Hub or Razer Synapse to change DPI manually. This gives better control for your preferred setup.
How to change Logitech mouse DPI?
Install and open Logitech G Hub, select your mouse, and navigate to the Sensitivity (DPI) section. You can add or remove DPI levels, customize shift speeds, and assign toggle buttons. Logitech’s software makes precision adjustment simple and reliable.
How to change DPI on Logitech mouse?
Press the DPI button near your scroll wheel to switch between preset levels. For exact control, use Logitech G Hub to manually enter your preferred DPI numbers. This helps you align sensitivity with your screen resolution and hand movement.
How to change mouse DPI to 800?
Open your mouse configuration software like Logitech G Hub, Razer Synapse, or Corsair iCUE and set DPI to 800 manually. You can also cycle DPI using hardware buttons until you reach 800. This DPI value is widely preferred for consistent precision.
How to change mouse DPI Windows 10?
Go to Control Panel > Hardware and Sound > Devices and Printers, right-click your mouse, and choose Mouse Settings. Adjust pointer speed or use official software for accurate DPI tuning. Proper DPI calibration improves comfort and tracking accuracy.
How to change DPI on CyberPower mouse?
Press the DPI button near the scroll wheel to toggle between built-in DPI presets. If supported, install CyberPower software for manual control over DPI levels. This ensures you get smoother pointer response for work or gaming.
How to change DPI on Skytech mouse?
Skytech mice often include a DPI button for quick switching. Each press adjusts between predefined sensitivity modes. For deeper customization, install any companion software to fine-tune DPI levels to your exact preference.
How to change mouse DPI on Chromebook?
Chromebooks don’t allow manual DPI changes. You can go to Settings > Device > Mouse and touchpad and use the Mouse speed slider to adjust sensitivity. If your mouse has DPI buttons, use them to modify hardware DPI directly.
How to change mouse DPI Windows 7?
Go to Control Panel, click Hardware and Sound, then open Mouse settings. Under Pointer Options, move the pointer speed slider or use software provided by your mouse manufacturer. This helps achieve smoother and more accurate pointer control.
How to change DPI on Corsair mouse?
Open Corsair iCUE software, choose your device, and navigate to DPI Settings. Here, you can set different DPI stages, enable DPI shift, or assign buttons for quick changes. Corsair’s advanced customization lets you optimize performance for every task.